Silhouette Print And Cut Pulling Mat Unloading

Pin On Silhouette Cameo Projects

Silhouette Basics Loading The Mat Caught By Design

Too Many Hobbies Packing Tape Clay Pottery Clay

Upcycle Old Silhouette Cutting Mats Into Re Usable Stencils Silhouette School

Give New Life To A Kitchen Aid Mixer Using Printable Vinyl And Cricut Printable Vinyl Vinyl Cricut

Let S Explore 5 Tips For Silhouette Users Silhouette Secrets
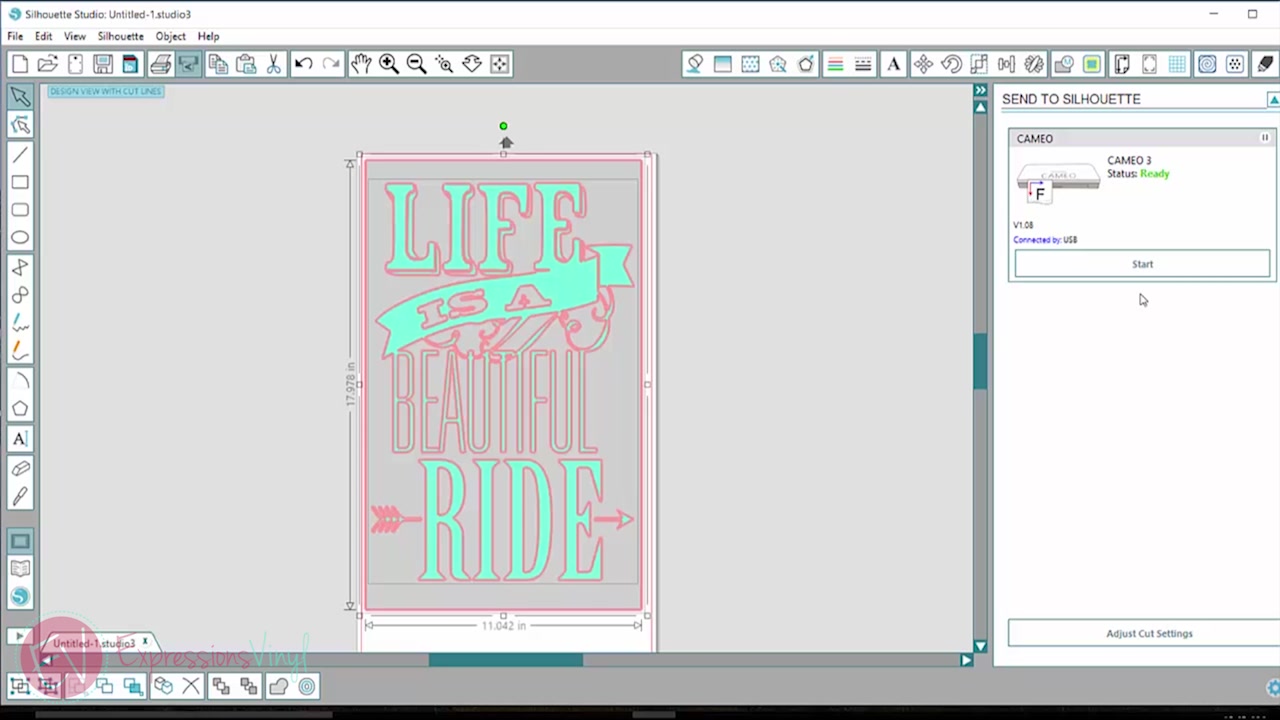
As defined in silhouette studio print and cut is a a feature where you can create a design in silhouette studio send it to your printer then use your printed design from your printer in your silhouette cameo to be cut your silhouette cameo uses special marks called registration marks to read your design and cut it out correctly along the.
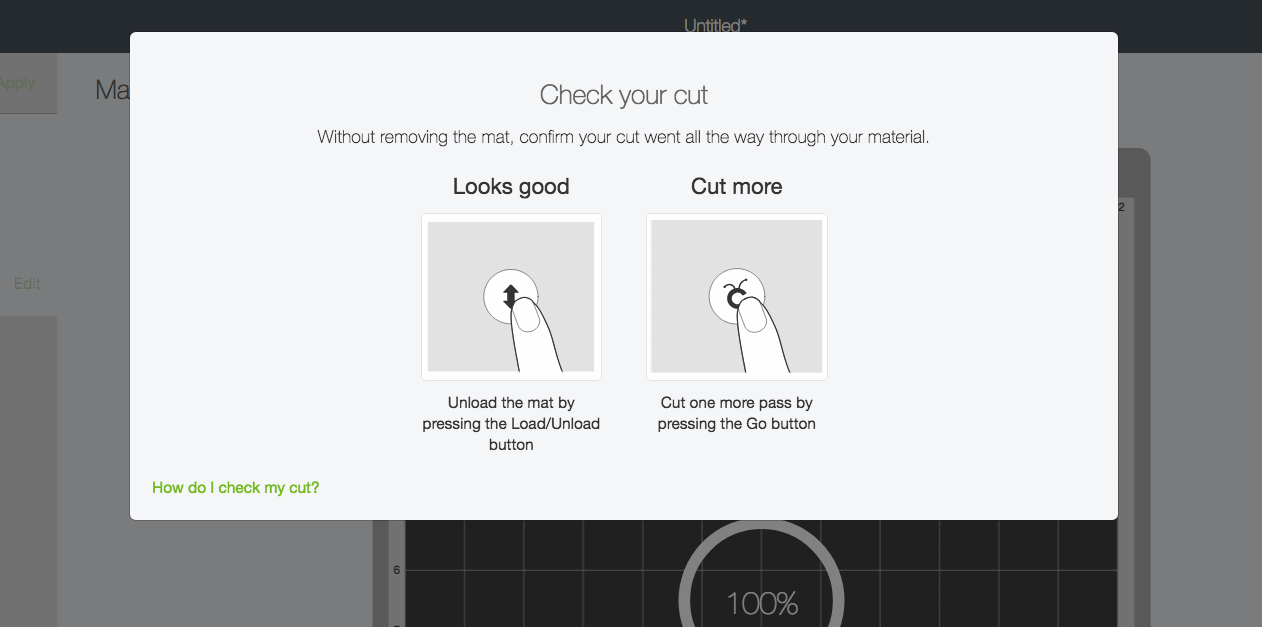
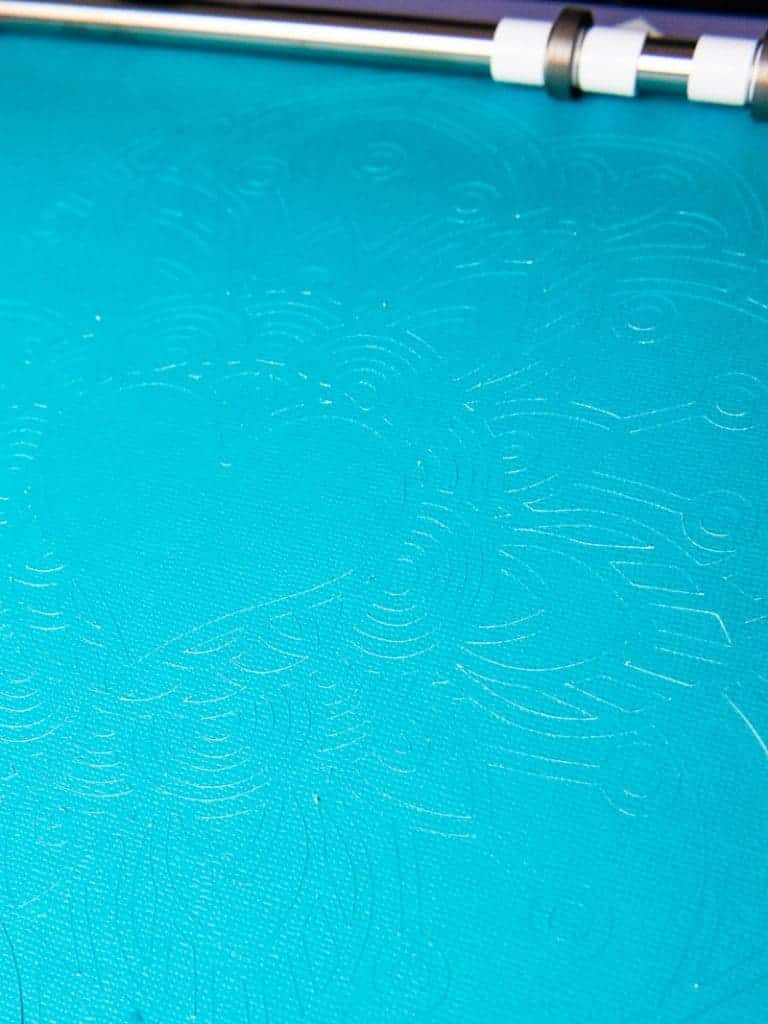
Silhouette print and cut pulling mat unloading. My silhouette is cutting through my material and into my mat. I will walk you through a few examples of how t. Here is two examples of how to do a print and cut for you. The silhouette s built in optic scanner will.
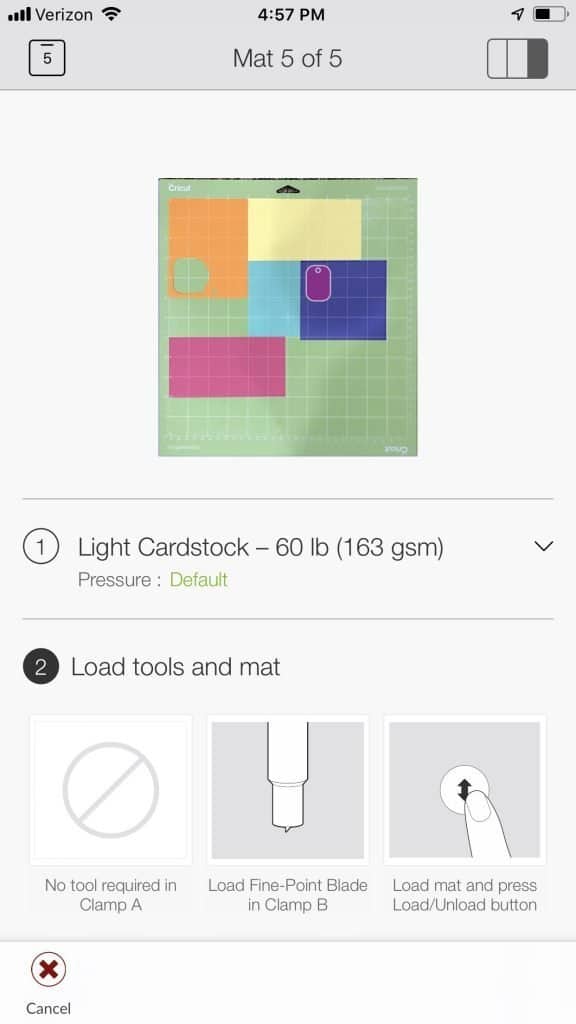
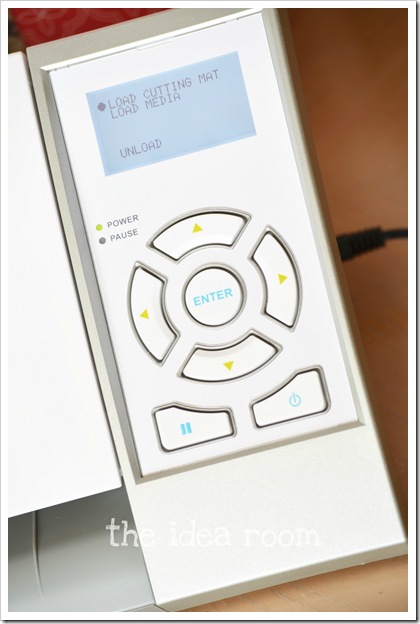
They are basically the same thing only the second one skips printing. Silhouette bootcamp lesson 21. Press enter when the bullet on the screen is next to load cutting mat for the rollers to begin pulling the mat and media inside the. You will use the registration marks feature to add marks to your file print your project to your home printer place your printed material onto a silhouette brand cutting mat and then load it into the silhouette machine.
Simply unload the cutting mat and reload the mat by selecting load cut mat. I am loading the mat with the correct command and am not using offset. The above layout is a trace and cut of the white mat from one of cindy s templates. Print cut projects involve sending a project to be printed from the silhouette studio program then cut from your silhouette machine.
It cut in the right place one time and then reverted back to cutting in the wrong place. It should load your cut mat to the correct placement to start cutting your material. How to use registration marks for print and cut in silhouette studio software. The first tutorial will be a print and cut and the second will be a trace and cut.
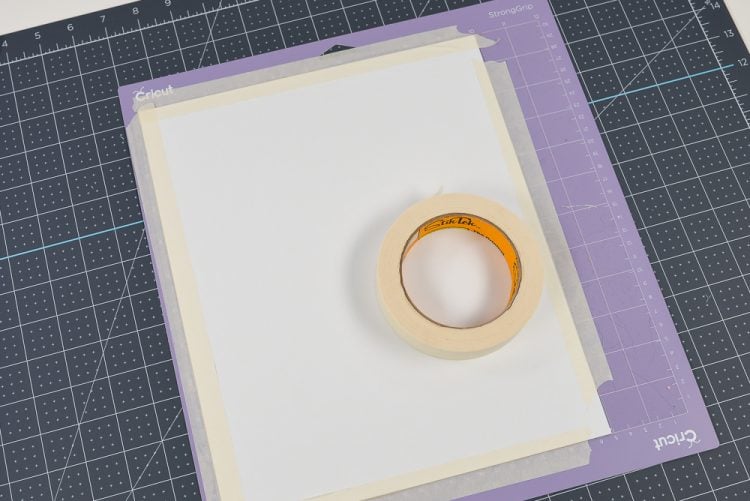
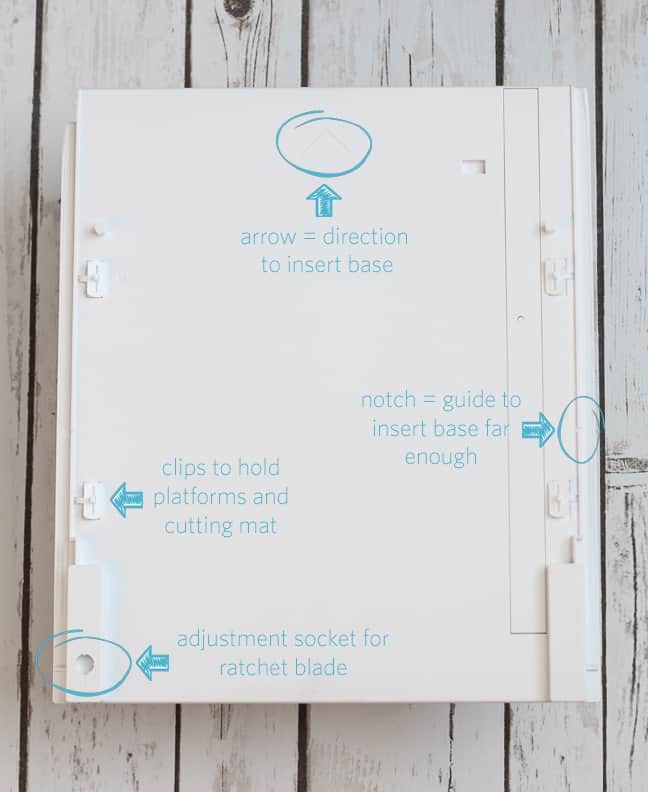
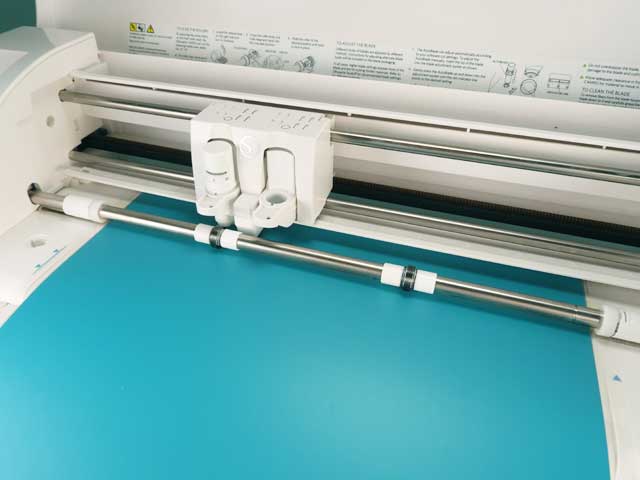
To load the cutting mat butt the front edge up against underneath the rollers. My silhouette 3 is still cutting in the wrong place up on the mat at the top left even though it is set for the 12 12 cutting mat in the silhouette studio. I am having issues with images on my mat not cutting in the same place as they appear in make the cut on the virtual mat when cutting to the cameo. If your blade is cutting through your material and into your mat you might need to adjust your cut settings.
With print cut you can use your free silhouette studio software to create a design or use a print cut design from the silhouette design store and print it out on your home printer. I have my 12 x 12 mat oriented portrait style in mtc which is how the mat is oriented in silhouette studio. The mat must be perfectly aligned to be under the outermost lip of the white roller for the mat to load correctly. What does print and cut mean in silhouette studio.

Silhouette Trick For Creating Almost No Vinyl Waste Silhouette School

How To Cut Siser Htv On The Silhouette Cameo 1 2 Or 3 Siser North America

Cricut Expression User Manual Learn Cricut In 2020 Cricut Expression Cricut Expressions

Cricut Joy Load And Unload Mats Youtube

How To Move The Test Cut Location Anywhere Silhouette Cameo Portrait Tutorial Silhouette School Bloglovin
How To Cut Chipboard On A Cricut Maker The Homes I Have Made

Let S Explore V4 The Send Tab Simple Silhouette Secrets
How To Cut Paper With A Silhouette Machine Simply Made Fun

Silhouette America How Tometal Etching
Brother Scanncut Dx Mat Issues Solved Youtube
Save Money By Using Snapmat To Cut Your Craft Scraps

Cut Leather With The Cricut Explore And Maker Hey Let S Make Stuff
Getting Started With Silhouette Curio Finding Time To Create

Silhouette Cameo Problems And Solutions Globug Ideasglobug Ideas
Https Www Silhouette101 Com Wp Content Uploads 2019 10 Ebook Cutting Basics Pdf

Silhouette Cameo 4 White Edition Amazon Sg Electronics

How To Make A Product Label With Silhouette 6 Steps Instructables

How To Cut Siser Htv With The Cricut Maker Siser North America

Silhouette Not Cutting Vinyl Straight Troubleshooting And Tips To Fix It Silhouette School

Pin By Craftdrawer Crafts Crafts On Cricut Hacks And Info In 2020 How To Use Cricut Cricut Tutorials Cricut Projects Beginner

How To Upload An Svg File To Cricut Design Space Cricut Cricut Expression Cricut Tutorials

Cricut Easter Peeps Treat Box Free Svg Cut File Better Life Blog

How To Cut Fabric With The Silhouette Cameo Meaning Of Life Designs By Sarah Vedeler

How To Create A Reusable Stencil With Your Silhouette Cameo Stamp Me Some Love

15 Silhouette Cameo Plus First Cut Silhouette School
Create A Stencil With The Silhouette Cameo Expressions Vinyl

Amazon Com Stronggrip Cutting Mat For Silhouette Cameo 4 3 2 1 12x12 Inch 3 Pack Monicut Cut Mats With Durable Adhesive Non Slip Pvc Perfect For Quilting Scrapbooking Sewing And All Arts
Getting Started With A Silhouette Cameo Burton Avenue

10 Hidden Features Of The Silhouette Cameo 3 Caught By Design
Https Nova Labs Org Wiki Media Groups 20190118 Novalabs Silhouette Pdf

The Ultimate Guide To Cricut Blades For Better Cutting
How To Use Oracal 651 Permanent Adhesive Vinyl Expressions Vinyl
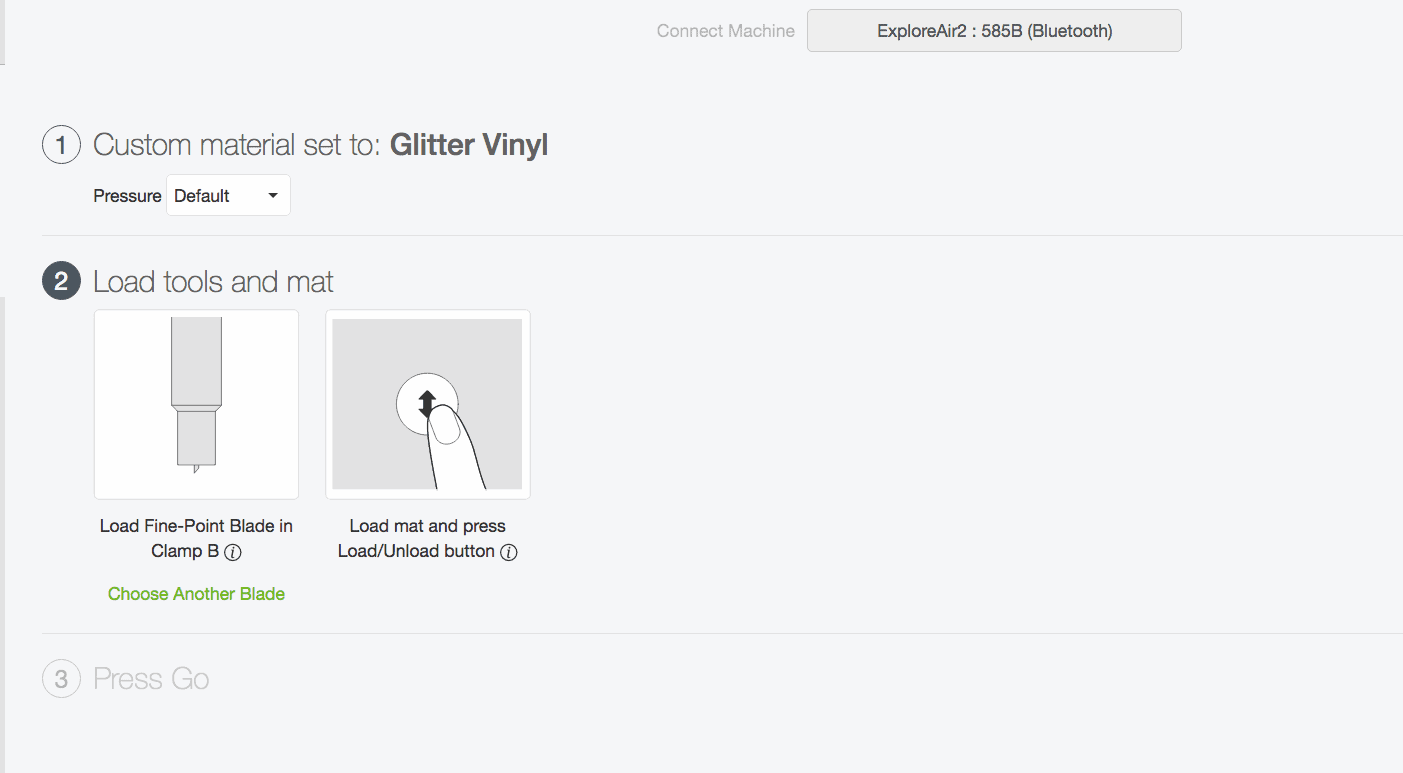
Working With Glitter Vinyl Tips And Tricks The Homes I Have Made
Scanncut Creativite By Erin Bassett
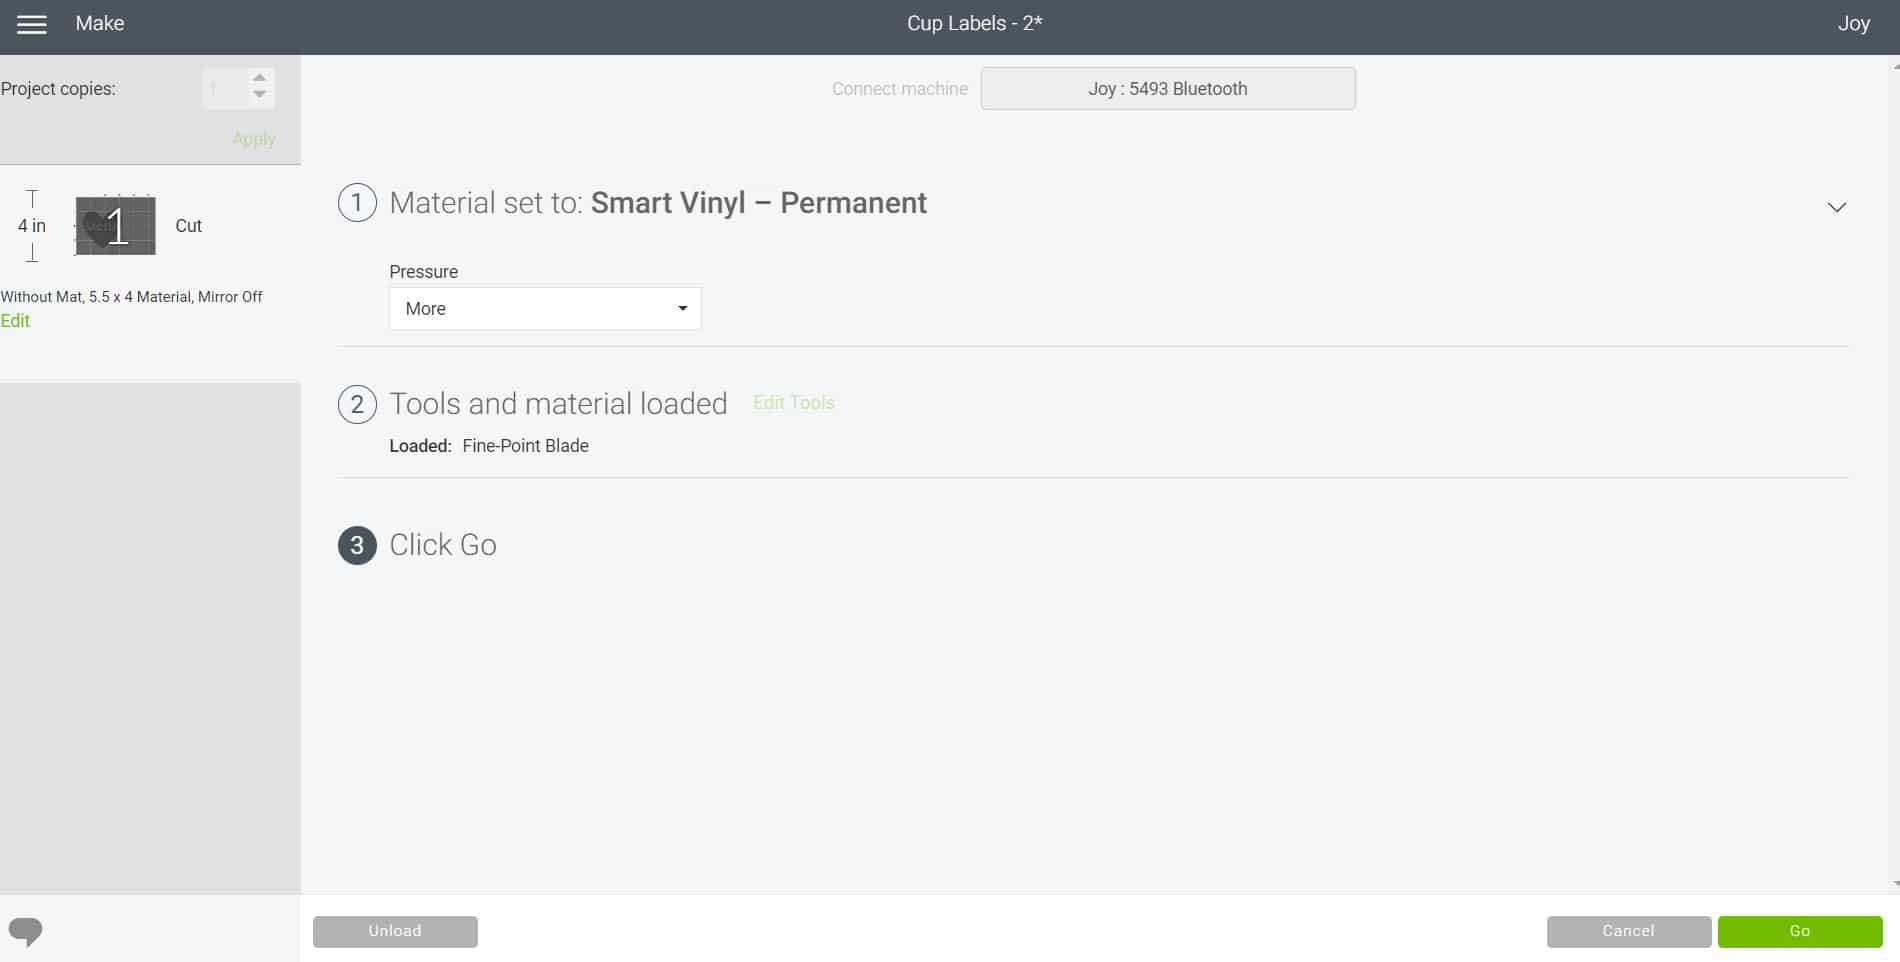
How To Use Cricut Smart Vinyl With Cricut Joy Happiness Is Homemade
Silhouette Cameo The Idea Room

Unable To Recognize Mat Unload Error Brother Scanncut Jen Blausey Youtube

How To Use Silhouette Cameo Basic Setup Tutorial

Male Bathroom 60 Decorating Ideas With Photos And Designs In 2020 Funny Bathroom Art Bathroom Humor Funny Bathroom Signs
Thanksgiving Diy Project How To Apply Adhesive Vinyl On Glass Votives
The Mat Cannot Be Recognized Brother
Http Www Nileslibrary Org Sites Default Files Silhouette 20cheat 20sheet Pdf
Cutting Matboard With The Cricut Knife Blade Tips Tricks

